Wednesday, May 2, 2012

What A Pretty Little Re-purpose

Good day to all, hope it's going well for you!  Whilst in the garage/studio yesterday, I came across a project that I started about...oh...maybe a year ago.  It wasn't like it was a big, complicated thing either...I just never got around to finishing it! Ahhhh, I tell you...I have GOT to get my procrastination under control.

Anyway, I figured I would go ahead and finish it here and let you see the tale end of what I had done and explain the rest.  I want to make more, that's all I can say.  Here's the rundown:

About a year ago, I was perusing the bins at the Goodwill Outlet and came across this tacky little wooden sort of frame/shadow box. I can't really explain it because I don't know myself what it really was.  At any rate, as soon as I turned it on it's side I realized I had to have it. It was made from old yard sticks!

Seriously, how awesome is this? And so easy to make I am sure! Moving on...next I covered the really, really, really tacky image of country ducks in dresses and bonnets up with a pretty and simple scrapbooking paper. I knew I wanted it to look like the sky but no so obviously so.

Next, I crafted some flowers out of old scrap wire that I had lying around (doesn't everyone have that?) and a gear for one flower head, and a flower brad for the other one. Glue gun at the ready, I attached the flowers to the bottom with a bit of hot glue.
After letting the glue dry (i.e. searching furiously for my bag of moss), I cut up some natural moss and glued it along the base of the inside, thereby covering any glue from the flowers too.
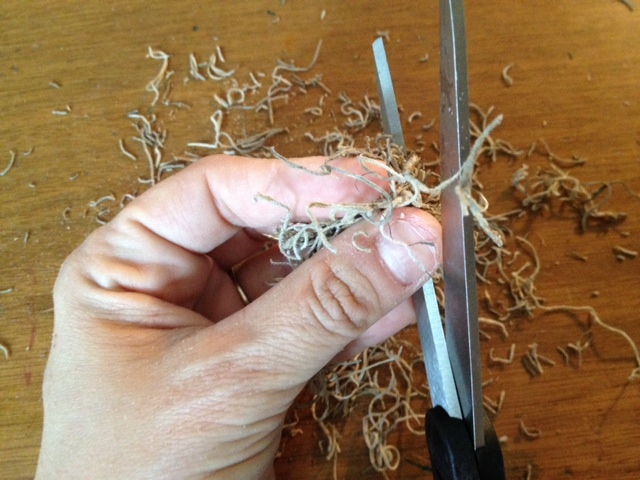
Note: If you are going to attempt something like this, a word of advice...put down some newspaper or another type of covering because the moss makes a huge mess!  (Note to self as well...I learned the hard way.)

Now, for the finished product...as always, let me know what you think and please, leave me comments!


Hope everyone has a great rest of the day! I am off to tend to these strange, obnoxiously loud beings that I call my children! :)


Tuesday, May 1, 2012

Tuesdays Rainy Day Tutorial

Man is it raining here! It has been raining off and on all day, along with all evening last night. I love it though!  Truth be told, I prefer the rainy, cool and cloudy days to the hot, humid and miserable ones.  

Since Zoe had me up all night, and I was up early this morning with Iris, I decided to throw together a little hair pin tutorial.  Granted, it is now evening, but I promise I worked on the project at seven this morning. 

This tutorial is really simple (that's the way I like 'em) and really cute.  I am a huge fan of bobby pins, and I have a small stockpile of them all over the house...in my car...in my purse...just about everywhere you can imagine.  So this morning, I pulled a few out and decided to "spruce" them up a bit.  I gathered my supplies, which consisted of: My trusty glue gun, scissors, a few bobby pins and a silver clip, buttons, flowers, game chips and a bit of felt for the backing. 


The first one I made was with a pink plastic flower that had a flat back.  I decided (after the fact and trial and error, truthfully) that I should probably add a bit of felt to the back for some support.  You will see what I mean in just a minute.  What I ended up doing, after finding that trying to apply the felt after attaching the flower was a major PIB (Pain In the Behind), was sliding the felt bit on first, adding the glue and then applying the flower.  Apply a little pressure and voila! You have a pretty little flashy bobby pin!

I tried this on myself, and it looks really cute and dainty...and NO, I am not posting a picture of myself wearing it...I haven't done my hair today...sorry! But trust me when I say, it would be really cute on anyone's "do", but especially in a little girls.
The second clip I made was with the silver clip. I was rummaging through my studio (i.e. my converted garage) looking for bits and baubles and I came across a cute little crocheted flower. Don't ask me where it came from, I have lost track of where anything comes from anymore.  At any rate, instead of collecting dust in my much under used studio, it will now sit pretty in one of my girls hair!
As you can see, I was able to apply the flower and not worry so much about having an issue getting the felt on.  I think after today, I may stick to these types of clips and alligator clips for awhile. :) 

So, So cute! This one turned out to be my favorite of the morning.  I may even have to keep this one from the girls and wear it myself.  

For the third one, I used another crocheted flower, along with a little metal flower embellishment and added it to a bobby pin.  to get the two flowers together, I simply glued them. Easy Peasy!
Ya know, come to think of it now...I think this one might be my favorite.  Its so dainty and...well...just...cute.
This would be really cute for a wedding, or first birthday.

Speaking of first birthdays, this last clip has that in mind. Well, in my mind it did anyway.  Too bad I don't know any little girls turning one! 

I had a random wood game piece with a number one on it. I immediately thought of how cute it would be to do one like this for each birthday year...until they got old enough to to tell you to knock it off anyway. :)

Same principles applied here, I slid the felt between the prongs first (my mind is in such a fog, I literally had to Google "what are those little arms on the bobby pin called?"...Lord help me.) and then applied the glue and finally attached the game piece.  


So all in all, I made four clips this morning. Not too shabby for four hours of sleep and terrible coffee! 


I am having so much fun with this blog so far!  I hope you are enjoying reading it as much as I am writing it.  Let me know what you think of my ideas and please feel free to post your own work! Have a great evening everyone, I'm off to finish my latest read, The Hollow by Jessica Verday. (Love this book!)