Showing posts with label crafts. Show all posts

Tuesday, May 15, 2012

Tuesday Fun! - "My Journal" For Kids

Good Day! Hope everyone had a wonderful weekend, and for all of you moms out there, I hope your Mothers Day was as good as mine was! My hubby treated me to some new shrubs and flowers for the front yard!! I may have worked my behind off on my special day, but it was so much fun I didn't want to stop! The yard looks wonderful now, and that makes me unbelievably happy.  (Major Kudos to my hubby for that!)  Zoe gave me a hand colored rock, and a flower she picked on a walk with her papaw the day before. :)  Iris gave me a framed photo of herself, she picked the frame out all by herself and paid with it with her own money too.  All in all it was a great day, and I am so thankful for what I have.  

Ok, enough gushing!.....

Today's tutorial is a project that I finished months ago, but only came across the other day.  I got the idea from something I had found on the Internet, but didn't want to pay $30 for! 


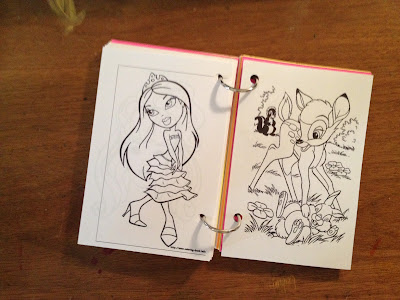
Basically, this a guided journal.  I made one for both of my girls, and my niece.  I put various fun questions on a page and then a space for the girls to fill in their answers.  I also added a few games, pictures and coloring pages as well.  Let me tell you, the girls LOVED their journals.  I just gave the journals to them yesterday and all three of them immediately started flipping pages and saying things like "Ohhhh I want to start on this one!", "Who wants to play Tic-Tac-Toe with me??".  This would be a great way to keep them busy on a long trip too.  I am actually thinking of putting one together for just that purpose.  Maybe more games? 

I printed all of these on 4x6 plain index cards, but obviously, you can make them any size you wish.  I wanted them to be small enough that they could throw them in their bags (or my purse).


There are tons of pages, as you can see from the above picture.  You could customize this anyway you want to, the possibilities are endless!  Like I said, I am thinking about making a travel one. You could make one that is all story starters, all games, all coloring...whatever you like, or whatever your kids like.  This took me a while to put together, but that was simply because I made it from scratch, and didn't really know what direction I wanted to go with it.  

When you are creating the pages, there is no need to format the page in Word to the size you are printing.  Just make sure when you are getting ready to print, you select the correct paper size.  Word (or whatever processor you are using) will shrink it to size. Also make sure that if you have the option, check "shrink to fit paper size" or something along those lines so that every bit of your page makes it on the smaller one.

When I was finished printing and compiling all of the pages, I simply hole punched  the pages and added metal rings to hold it all together.  Iris commented that she liked the way she could fold the pages underneath one another without bending any of them. (Score one for mom!)

So there you have it, another kid friendly project! You could collaborate with the kiddos ( I wanted mine to be a surprise) and come up with page ideas together. Maybe make a "Mommy and Me" journal? 

Let me know what you come up with! It's hard work, but its so much fun and so rewarding to see the smiles on their faces when you give them their personal journals.

Have a wonderful day everyone, Zoe and I are heading out to get her birthday party goodies.  (Ahhhh, I am so behind on this party stuff. I am usually on top of it! )


Tuesday, May 8, 2012

Tuesday's Tutorial - "Deck of Hearts"

Good evening all! Hope the week is going well for all, so far...it is only Tuesday I suppose. ;)

The project I am going to go through today is a slight spin-off from a piece I saw on...wait for it...Pinterest.  Never would have guessed that would you? 

The original piece I saw was made from paint chips from a home improvement store, mine is made from playing cards. Have a gander...


This was a pretty easy project from start to finish.  The only issue I ran into was finding paper that was thick enough for the hearts.  I started out using vintage sheet music but it was so thin and flimsy that it sort of warped when I stuck it to the adhesive dots (I will get to that in a minute). For now, let us please have a moment of silence for the vintage, an totally un-reusable sheet music.............I hate to waste good vintage paper. 

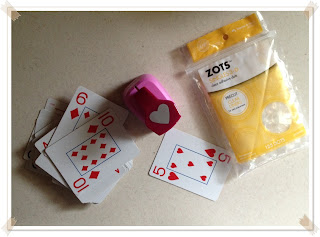
So, to start out, I gathered my supplies which consisted of: A heart shaped paper punch ( you could use any shape to your liking though), playing cards, scissors, "ZOTS 3-D adhesive dots", A thick piece of watercolor paper, a ruler and finally a shadow box frame.
The first thing I did was punch out all of my hearts. I wasn't sure how many I would actually use, so I just kept punching away! It actually becomes kind of addictive to punch all of these shapes, I almost couldn't stop!  

Next thing I did was decide how big of an area I wanted to fill. Since my frame was a square 12 x 12, I knew I needed to keep it a square shape. I decided on 9x9, to leave a bit of the background visible to give it more depth. After that was done, I lightly drew some lines to give myself an idea of where I wanted to place the hearts.
As you can see above, when I said lightly, I meant it. I didn't want any pencil markings left behind. 

Once I had everything lined up, I started applying the adhesive dots. These things are an absolute godsend. They were easy to work with and they have some serious sticking power. If you want to pick some up, I found mine at Hobby Lobby and they are called "ZOTS Singles 3-D Adhesive Dots". For this project I used 1/2", but they had additional sizes as well. 
You may be able to tell from the above picture that there are clear squares around the circle shapes. Those are just the backing. I left them on there until I was ready to place the hearts because, like I said above, they have serious sticking power. You will need to remove these, obviously, prior to sticking anything on them. 
Once I got the dots where I wanted them, I erased the remaining pencil lines. 

***NOTE: I have recently fallen in love with my Sharpie Liquid Pencil. This pencil is great. It's erasable like a pencil (even better than a regular pencil, in my opinion), but you don't have to worry about broken lead, or sharpening because it literally works like a click pen. ***

Anywhoo...Just about finished now! Once I had all of my hearts stuck in place, I attached the finished piece to the velvet background of the shadow box frame with more ZOTS. (So far so good, as far as it staying in place.) I wanted to give a 3-D effect to the whole piece, I didn't want to secure it flat to the background. I felt like it would take away from the whole 3-D thing I was going for. So that is why I chose to use the ZOTS dots (that rhymes!), but you could choose to do it differently. It all about you!


And there you have it! I actually love this piece. I can't wait to find a special place for it to hang. But, for now, it sits on my desk as a reminder of what I am capable of and why I love being creative. :) 

Let me know what you think! Shoot me an email, or comment here...feedback is always appreciated!
Don't forget, you can now subscribe to my blog via email to get my post automatically sent to you!

Check back often, I have some ideas in the works that may involve a giveaway or two!! (Who doesn't love fee stuff?!?)


Thursday, May 3, 2012

Who Would Have Thunk It Could Work...

Good day readers! Today I am going to walk you through one of the easiest but most fun and kid friendly projects ever. 

**Note: You will start seeing the finished product first, before I go into the step-by-step, so you know what you are going to be looking at! Sorry for the previous tutorials where I didn't do this. But hey, it's a learning process, right?**

I found this project on Pinterest (LOVE that website) a few months back and I have been dying to try it. Finally, this blog gives me a reason to try out all these things I want to do!! You basically grab a canvas, a bottle of Elmer's Glue, and pencil and some paint. Simple. 

What I did next is totally optional, if you would rather free-hand just skip this step.  I drew out the basic picture I wanted to "glue draw" ,with a pencil. I liked doing this so I could see before applying the glue what it would look like.  
Once you have the basic layout, start drawing with glue!  Now, what I did find is that it is best to hold the tip of the bottle directly on the canvas if you want it to match your drawing lines perfectly.  I did not discover this until I was almost done, but I liked the way it turned out anyway, so I didn't bother starting over. 

This is what it looked like when I was done with the glue part of the project.  Now comes the waiting...and more waiting...and even more waiting.  The thicker the glue, the longer it will take to set. Finally after several hours of drying ( I may have over done it, but I wanted to make sure it was really dry. I didn't want the paint to smear the glue!), just start painting until your heart's content!  You could use one color, or you could do a mixture of several colors.  It all depends on the look you are going for.  For purposes of this tutorial, I painted it one color. 
And there you have it, the finished product.  I did learn a few lessons throughout the process. As I mentioned before, keep the tip of the glue bottle against the canvas as you "draw" with it.  I think the next time I do one of these, I am going to make the glue a little heavier to give it even more texture and 3-D appearance.

I hope you enjoy trying this as much as I did.  Please feel free to post your own work, or shoot me an email with questions! Comments are always appreciated so please leave me one!

Until tomorrow, have a great evening!


Wednesday, May 2, 2012

What A Pretty Little Re-purpose

Good day to all, hope it's going well for you!  Whilst in the garage/studio yesterday, I came across a project that I started about...oh...maybe a year ago.  It wasn't like it was a big, complicated thing either...I just never got around to finishing it! Ahhhh, I tell you...I have GOT to get my procrastination under control.

Anyway, I figured I would go ahead and finish it here and let you see the tale end of what I had done and explain the rest.  I want to make more, that's all I can say.  Here's the rundown:

About a year ago, I was perusing the bins at the Goodwill Outlet and came across this tacky little wooden sort of frame/shadow box. I can't really explain it because I don't know myself what it really was.  At any rate, as soon as I turned it on it's side I realized I had to have it. It was made from old yard sticks!

Seriously, how awesome is this? And so easy to make I am sure! Moving on...next I covered the really, really, really tacky image of country ducks in dresses and bonnets up with a pretty and simple scrapbooking paper. I knew I wanted it to look like the sky but no so obviously so.

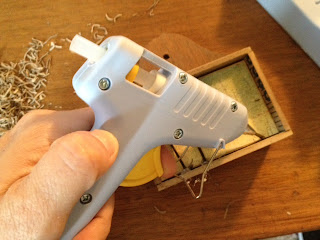
Next, I crafted some flowers out of old scrap wire that I had lying around (doesn't everyone have that?) and a gear for one flower head, and a flower brad for the other one. Glue gun at the ready, I attached the flowers to the bottom with a bit of hot glue.
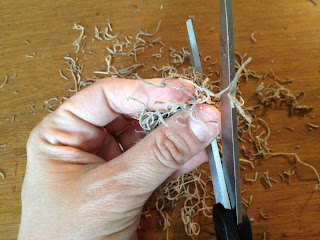
After letting the glue dry (i.e. searching furiously for my bag of moss), I cut up some natural moss and glued it along the base of the inside, thereby covering any glue from the flowers too.
Note: If you are going to attempt something like this, a word of advice...put down some newspaper or another type of covering because the moss makes a huge mess!  (Note to self as well...I learned the hard way.)

Now, for the finished product...as always, let me know what you think and please, leave me comments!


Hope everyone has a great rest of the day! I am off to tend to these strange, obnoxiously loud beings that I call my children! :)


Tuesday, May 1, 2012

Tuesdays Rainy Day Tutorial

Man is it raining here! It has been raining off and on all day, along with all evening last night. I love it though!  Truth be told, I prefer the rainy, cool and cloudy days to the hot, humid and miserable ones.  

Since Zoe had me up all night, and I was up early this morning with Iris, I decided to throw together a little hair pin tutorial.  Granted, it is now evening, but I promise I worked on the project at seven this morning. 

This tutorial is really simple (that's the way I like 'em) and really cute.  I am a huge fan of bobby pins, and I have a small stockpile of them all over the house...in my car...in my purse...just about everywhere you can imagine.  So this morning, I pulled a few out and decided to "spruce" them up a bit.  I gathered my supplies, which consisted of: My trusty glue gun, scissors, a few bobby pins and a silver clip, buttons, flowers, game chips and a bit of felt for the backing. 


The first one I made was with a pink plastic flower that had a flat back.  I decided (after the fact and trial and error, truthfully) that I should probably add a bit of felt to the back for some support.  You will see what I mean in just a minute.  What I ended up doing, after finding that trying to apply the felt after attaching the flower was a major PIB (Pain In the Behind), was sliding the felt bit on first, adding the glue and then applying the flower.  Apply a little pressure and voila! You have a pretty little flashy bobby pin!

I tried this on myself, and it looks really cute and dainty...and NO, I am not posting a picture of myself wearing it...I haven't done my hair today...sorry! But trust me when I say, it would be really cute on anyone's "do", but especially in a little girls.
The second clip I made was with the silver clip. I was rummaging through my studio (i.e. my converted garage) looking for bits and baubles and I came across a cute little crocheted flower. Don't ask me where it came from, I have lost track of where anything comes from anymore.  At any rate, instead of collecting dust in my much under used studio, it will now sit pretty in one of my girls hair!
As you can see, I was able to apply the flower and not worry so much about having an issue getting the felt on.  I think after today, I may stick to these types of clips and alligator clips for awhile. :) 

So, So cute! This one turned out to be my favorite of the morning.  I may even have to keep this one from the girls and wear it myself.  

For the third one, I used another crocheted flower, along with a little metal flower embellishment and added it to a bobby pin.  to get the two flowers together, I simply glued them. Easy Peasy!
Ya know, come to think of it now...I think this one might be my favorite.  Its so dainty and...well...just...cute.
This would be really cute for a wedding, or first birthday.

Speaking of first birthdays, this last clip has that in mind. Well, in my mind it did anyway.  Too bad I don't know any little girls turning one! 

I had a random wood game piece with a number one on it. I immediately thought of how cute it would be to do one like this for each birthday year...until they got old enough to to tell you to knock it off anyway. :)

Same principles applied here, I slid the felt between the prongs first (my mind is in such a fog, I literally had to Google "what are those little arms on the bobby pin called?"...Lord help me.) and then applied the glue and finally attached the game piece.  


So all in all, I made four clips this morning. Not too shabby for four hours of sleep and terrible coffee! 


I am having so much fun with this blog so far!  I hope you are enjoying reading it as much as I am writing it.  Let me know what you think of my ideas and please feel free to post your own work! Have a great evening everyone, I'm off to finish my latest read, The Hollow by Jessica Verday. (Love this book!)


Thursday, April 26, 2012

The First Tutorial! - Washi Tape

Hope everyone is having a wonderful week so far, thank goodness it's almost over! Then comes a weekend full of tee-ball (Zoe) and Soccer (Iris) games!  

Today I decided to try out my tutorial skills. Bear with me here while I get my feet wet.  I've visited a lot of blogs that have tutorials on them and they can vary from completely vague to overly detailed...I would like to be somewhere in between.  I mean, I don't want to make you think I think you are an idiot now do I? NO!  But, at the same time, I also don't want to leave you in the dark and wonder "How did she get to that point?".  I also didn't want to start off with some crazy hard project. Mainly because my kids are insane and I don't have the time! :)  So, I figure Washi Tape is a good starting point. It's so easy to make and so versatile, I just wish I would have found out earlier!!

So....here we go! I'm going to show you how I am using my homemade Washi Tape to embellish my blog's "calling card".

Step one is to find a good double sided tape. I found that Scotch 3m Scrapbooking Tape is a really good one.
After you have found a good, strong tape, the next step is the best step! Finding the paper or fabric you want to apply. 

 
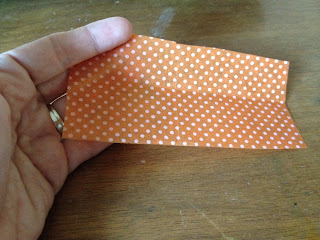
With so many patterns out there, the possibilities are endless.  I chose a piece of polka dotted tissue paper. I really like the tissue because it is lightweight, and still appears somewhat transparent once applied to the tape. But, for added texture, fabric or even scrapbooking paper would work well too.

Once you have completed the daunting task of choosing the pattern you want, (Oh the injustice of so many pretty choices, right?) and cutting it to size, you carefully apply the tape sticky side down (duh!).  Make sure you get a good hold on the paper, and that there are no air bubbles or buckling.  You can either do this with your fingertip, or use a brayer if you have one. 


Once you have the tape secured to the paper, simply trim around it with scissors.  Depending on the width of the tape you use, you could even use specialty scissors to create a patterned edge for an extra flair! (I love it when a good idea comes to me spontaneously. Note to self: Invest in pretty scissors!!)


Now, you have your very own, homemade Washi Tape! Like I said earlier I am using mine to embellish my cards.  Since I already had them printed, I just needed to peel and stick and voila! 


 A much prettier and much more unique calling card! Just make sure when peeling the paper off of the other side of the tape, you don't accidentally "kink" it. I did this and although I was able to "un-kink" it, I found it left a little crease. This was probably because I used a thin tissue. 

The possibilities are, literally, endless. Embellish a candle holder, envelopes, stationary, picture frames...I could go on and on and on and....well, you get the idea. Endless. Possibilities. Period.

I hope this little beginning tutorial was helpful and inspiring. Ive seen Washi Tape on Etsy and other craft sites and the prices are crazy! I think I paid $5.00 for the roll of tape, and the tissue was from a box of old scraps I bought at the Goodwill Outlet last year. Way more cost effective, and I can say that I made it. 

I would love to see what you have come up with, or other ways of making Washi Tape. Post a comment, or shoot me an email with your own ideas! Let's get creative!